


It is 3:00 PM on Thanksgiving Day. The turkey is out, the gravy is poured, and the kitchen is a battlefield. Your blender, which you used to puree the vegetable soup, make the cranberry sauce smoothie, or blitz the herb compound butter, is now caked with dried starches and sticky fats. You know the feeling: you want to just run it under the tap, but the manual says "do not immerse the base," and the blades look like a hazard. Leaving it alone is not an option; dried food rots and smells terrible. This guide walks you through the exact, safe steps to disassemble, clean, and sanitize your blender so it is ready for the next holiday or daily use. We will cover how to handle stubborn dried sauces, what never to put in the dishwasher, and how to maintain the internal components to keep your machine running smoothly for years.
Immediate Steps: The 5-Minute Reset
Before you even think about taking the blender apart, you need to address the immediate mess inside the jar. The goal here is to loosen the bulk of the food without scratching the jar or bending the blades. Resist the urge to scrape the bottom with a knife or spoon. The blades are sharp, and the jar is often made of BPA-free plastic or glass that can scratch. Scratches harbor bacteria and make future cleaning harder. Instead, use liquid power to do the work for you.
The Hot Water and Soap Method
If you just finished blending hot soup or gravy, let the jar cool for two to three minutes. Do not run hot liquid directly into a cold glass jar; the thermal shock can crack the glass. Once it is warm to the touch, fill the jar with hot tap water until it is about half full. Add one or two drops of mild dish soap. The soap breaks down the fats from the turkey gravy or butter, while the hot water dissolves the starches from the vegetables or potatoes.
Running the Cycle
Secure the lid tightly. Turn the blender on to the highest speed setting for 30 to 60 seconds. You will see the water turn cloudy and foam up. This is the soap emulsifying the oil and breaking down the food particles. If you have a "Pulse" button, use it a few times at the beginning to break up any large clumps stuck to the sides. After the cycle, pour the soapy water into the sink. If the water is still very cloudy or smells strongly of food, repeat the process with fresh water and a drop of soap. This "double rinse" is crucial for heavy-duty tasks like Thanksgiving prep.
Wiping the Exterior
While the jar is rinsing, take a clean microfiber cloth or paper towel and wipe down the outside of the jar. Splashbacks often happen when the lid is not sealed perfectly or when the blender is overfilled. Wipe the base of the machine with a damp cloth to remove any drips that fell onto the counter or the motor housing. Do not submerge the base unit in water. The motor and electrical components are sealed, but water can still seep into the vents or the connection point between the jar and the base, causing shorts or corrosion over time.
Disassembly: Taking It Apart Safely
Now that the main jar is mostly clean, it is time to tackle the parts that touch the food. Most blenders have three main food-contact components: the jar, the lid, and the gasket (the rubber seal inside the lid). Some high-end models have a removable blade assembly, but many standard household blenders have the blades fixed to the bottom of the jar. You need to know which type you have before proceeding.
Identifying Your Blade Type
Look at the bottom of your jar. If you can twist the blade assembly counter-clockwise, it is removable. If it is fixed and you cannot turn it, it is a sealed unit. For sealed units, you cannot take the blades off to wash them by hand. You must rely on the self-cleaning method described above, followed by a thorough rinse. For removable blade units, you can unscrew the assembly and wash the blades and the mounting hardware separately. This allows for a deeper clean of the crevices where food often gets trapped.
Handling the Lid and Gasket
Remove the lid from the jar. Most lids have a small, removable cap in the center. This cap is where you pour ingredients in. It also has a rubber gasket underneath that creates the seal. This gasket is the most likely place for mold to grow if not cleaned regularly. It is also where dried cranberry sauce or thick gravy can get stuck. Remove the gasket by gently prying it out with your fingernail or a blunt tool like a plastic spatula. Do not use metal tools, as they can cut or tear the rubber. Once removed, you can see the threads on the lid cap. These threads often have food residue stuck in the grooves.
Checking for Hidden Debris
Inspect the underside of the lid and the top rim of the jar. Small bits of food often fly up during blending and stick to the top of the jar or the underside of the lid. Use a damp paper towel to wipe these areas. If there are stubborn spots, use a soft-bristled brush, such as an old toothbrush, to scrub them away. The bristles are soft enough not to scratch the plastic or glass but firm enough to dislodge dried particles. Pay special attention to the area where the lid meets the jar, as this is the primary seal point.
Deep Cleaning: Handling Dried Residue and Blades
Even after the hot water and soap cycle, you might find dried residue on the blades or the bottom of the jar. This is common with starchy foods like potatoes or thick sauces. The key to removing this residue without damaging the blender is patience and the right tools. Never use abrasive scrubbers like steel wool or harsh chemical cleaners like bleach or oven cleaner. These can scratch the surface of the jar, creating microscopic pits where bacteria can thrive. They can also corrode the stainless steel blades, leading to rust and dullness.
Soaking for Stubborn Stains
If there is dried sauce on the bottom of the jar, fill the jar with warm water and a teaspoon of baking soda. Let it soak for 15 to 30 minutes. Baking soda is a mild abrasive that helps lift stains without being harsh on the material. After soaking, run the blender on low speed for a few seconds to circulate the solution, then turn it off and pour it out. Inspect the bottom again. If the residue is gone, proceed to the final rinse. If not, repeat the soak. Do not try to scrape it off with a knife. The blades are sharp, and you risk injury. Also, scratching the jar weakens its structural integrity over time.
Cleaning the Blade Assembly
For blenders with removable blades, unscrew the assembly carefully. Rinse the blades under running water, using your hand to gently move the water through the gaps. Use a soft brush to clean the area where the blades attach to the motor shaft. This area often has mineral deposits or food particles stuck to it. Dry the blades thoroughly with a towel before reattaching them. Moisture left on the blades can cause rust, especially if the blender is stored in a humid kitchen. For blenders with fixed blades, ensure that the final rinse cycle is long enough to flush all debris from the blade area. You can also use a long-handled bottle brush to gently scrub the sides of the jar, reaching the areas near the blades without putting your hand in danger.
Sanitizing the Components
After cleaning, it is a good idea to sanitize the food-contact parts. You can do this by filling the jar with a mixture of one part white vinegar and three parts water. Run the blender for 30 seconds, then let it sit for five minutes. Vinegar is a natural disinfectant that kills bacteria and removes odors. Afterward, rinse the jar thoroughly with clean water to remove the vinegar smell. Alternatively, you can use a food-safe sanitizer spray, following the manufacturer's instructions. This step is particularly important if you used the blender for raw ingredients or if you plan to store it for a long period.
Choosing the Right Cleaning Tools and Supplies
Having the right tools makes the cleaning process faster and safer. You do not need expensive specialty equipment, but having a few specific items on hand will save you time and frustration. The right tools also help prevent accidents, such as cutting your fingers or scratching the jar.
Essential Tools for Blender Cleaning
- Soft-bristled brush: A bottle brush or an old toothbrush is perfect for cleaning the threads on the lid and the areas around the blades. Avoid wire brushes, which can scratch the surface.
- Microfiber cloths: These are excellent for wiping down the exterior of the blender and drying the interior. They are lint-free and absorbent.
- Plastic spatula: Use a plastic spatula to scrape excess food from the sides of the jar before blending. Do not use metal utensils, which can scratch the jar.
- Drop of dish soap: A mild, unscented dish soap is best. Strongly scented soaps can leave a residue that affects the taste of future blends.
- Baking soda: Useful for removing odors and loosening dried stains. It is gentle on both glass and plastic jars.
- White vinegar: A natural disinfectant and deodorizer. It is safe for all blender components.
Recommended Cleaning Supplies
While you can use household items for cleaning, having dedicated supplies can make the process more efficient. We recommend a few specific products that fit the needs of a busy home cook. These items are designed to be gentle on appliances while being effective at removing tough residues.
-
Women's Street Hip-hop Washed Graffiti Brushed Jumpsuit
🏆 Top pickBest for Home cooks who want a comfortable, durable outfit for long cleaning sessions. The cotton fabric is breathable and allows for free movement.
- Pros: Made of cotton, which is soft against the skin and easy to wash; available in multiple sizes (S, M, L) for a better fit.
- Con: Asian sizing runs small, so you should size up if you are between sizes.
-
Fashion Special Women's Clothing Hollow-out Jumpsuit
⭐ Editor's pickBest for Individuals who prefer a stylish, lightweight outfit for kitchen tasks. The polyester material is quick-drying and easy to care for.
- Pros: Available in a wide range of colors and sizes (S to XXL), making it easy to find a match for your style; lightweight polyester is resistant to wrinkles.
- Con: Polyester can trap heat, so it may not be ideal for very hot kitchens or intense physical activity.
-
Leopard-print Strap Jumpsuit Plus-size Womens Clothing
⭐ Editor's pickBest for Plus-size cooks who want a comfortable, stretchy outfit for moving around the kitchen. The polyester fabric is durable and easy to clean.
- Pros: Available in extended sizes (1XL to 5XL), ensuring a comfortable fit for a wider range of body types; durable polyester fabric withstands frequent washing.
- Con: The leopard print may not be suitable for those who prefer neutral or solid colors in their kitchen attire.
-
Women Clothes Women's Casual Office Blouse
⭐ Editor's pickBest for Those who transition from kitchen work to casual office settings without changing clothes. The asymmetrical hem adds a modern touch.
- Pros: Made of 95% polyester and 5% elastane, providing stretch and comfort; available in multiple sizes (S to 3XL) for a versatile fit.
- Con: The woven fabric may wrinkle easily if not ironed, which could be an issue if you need to look polished after cleaning.
-
Solid Color Hooded Split Shoulder Sleeve Brushed Hoody
⭐ Editor's pickBest for Cold kitchen environments or early morning prep. The brushed polyester fabric provides warmth and comfort.
- Pros: Available in a wide range of sizes (S to XXXL) and colors; the hooded design offers extra warmth and protection from splashes.
- Con: The split shoulder design may be restrictive for some people, limiting arm movement during heavy lifting or scrubbing.
-
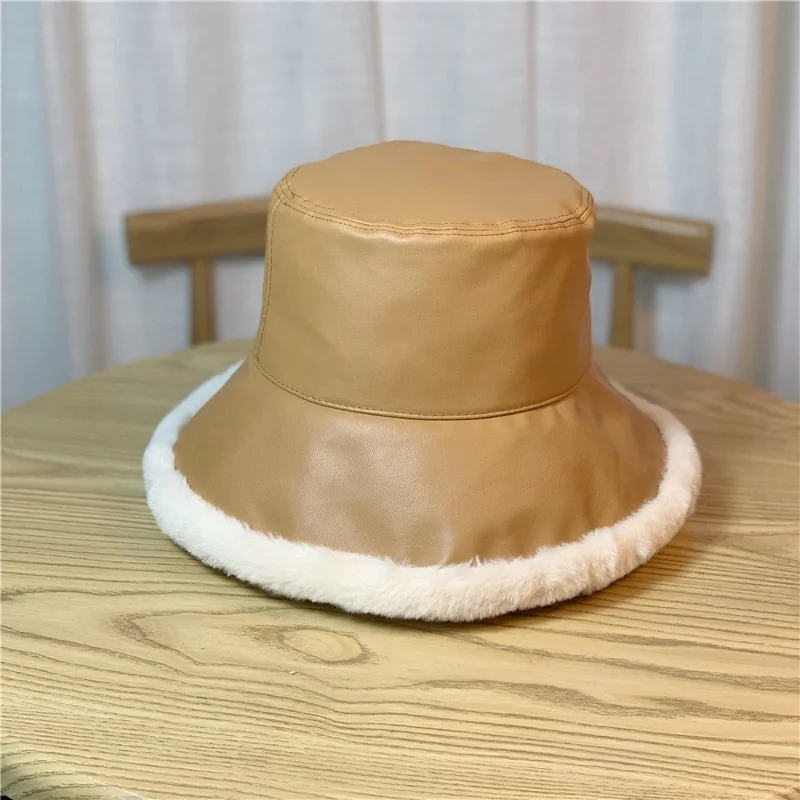
Warm Fleece Bucket Hat
⭐ Editor's pickBest for Keeping hair clean and out of the way while cleaning. The adjustable size ensures a secure fit.
- Pros: Soft fleece material is comfortable and warm; adjustable size (54 to 58) fits most head sizes securely.
- Con: Fleece can attract lint and hair, so it may need frequent washing to stay hygienic.





Common Mistakes That Damage Blenders
Even with the best intentions, it is easy to make mistakes that can shorten the life of your blender. These errors are often caused by lack of knowledge or rushing the process. Avoiding them will keep your appliance running smoothly and prevent costly repairs.
Overfilling the Jar
One of the most common mistakes is overfilling the jar. When the blender is too full, the ingredients cannot circulate properly, causing the motor to work harder and overheat. This can damage the motor and the blades. Always follow the manufacturer's maximum fill line, which is usually marked on the jar. For thick mixtures like nut butters or frozen fruits, fill the jar no more than two-thirds full. For liquids, you can fill it closer to the top, but leave enough space for the ingredients to move freely.
Using Abrasive Cleaners
As mentioned earlier, using steel wool or harsh chemical cleaners can scratch the jar and corrode the blades. Scratches on the jar create a rough surface where bacteria can hide, making the blender harder to clean in the future. Corroded blades become dull and less effective, and the rust can contaminate your food. Stick to mild dish soap, baking soda, and vinegar for cleaning. These natural ingredients are safe for all blender components and effective at removing residues.
Ignoring the Gasket
The rubber gasket is a small but critical component. It creates the seal between the lid and the jar, preventing leaks and keeping the blender tight during operation. If the gasket is not cleaned regularly, food particles can get trapped in the rubber, leading to mold growth and unpleasant odors. Mold can also weaken the rubber, causing it to crack or tear. Check the gasket every month, and replace it if you see any signs of wear, such as cracks, discoloration, or a change in shape.
Running the Blender Empty
Running the blender with no ingredients or only a small amount of liquid can damage the blades and the motor. The blades need something to grab onto in order to circulate the mixture. Without enough material, the blades just spin in the air, causing unnecessary wear and tear. Always add at least half a cup of liquid or ingredients before turning on the blender. If you are cleaning the blender, make sure to fill it with enough water and soap to cover the blades.
Neglecting the Base Unit
The base unit of the blender is home to the motor and the electrical components. It is not meant to be submerged in water, but it should be wiped down regularly to remove dust and crumbs. Dust can accumulate in the vents, causing the motor to overheat. Crumbs can fall into the connection point between the jar and the base, causing shorts or corrosion. Use a dry or slightly damp cloth to wipe the base after each use. Do not use water directly on the base, as it can seep into the electronics.
Maintenance and Care Tips for Longevity
Cleaning your blender after each use is the first step in maintaining it, but there are other practices you can adopt to extend its lifespan.